Brief Photography Tips for Beginners to Have Good Photography
Regardless of whether you’ve essentially bought your first DSLR and wish to discover the basics or territory unit attempting to discover clear approaches to refresh your current photography abilities, the ensuing tips should help you build an amazing establishment. Keep in mind, nonetheless, that photography is Associate in nursing craftsmanship you’ll ne’er incredibly be ‘done’ learning.
The best gratitude to keeping up is to notice ordinarily, construct botches and be open to gaining from others, regardless of whether they’re grounded picture takers or novices to the art.
Let’s Talk About Essential Photography Tips For Beginners.
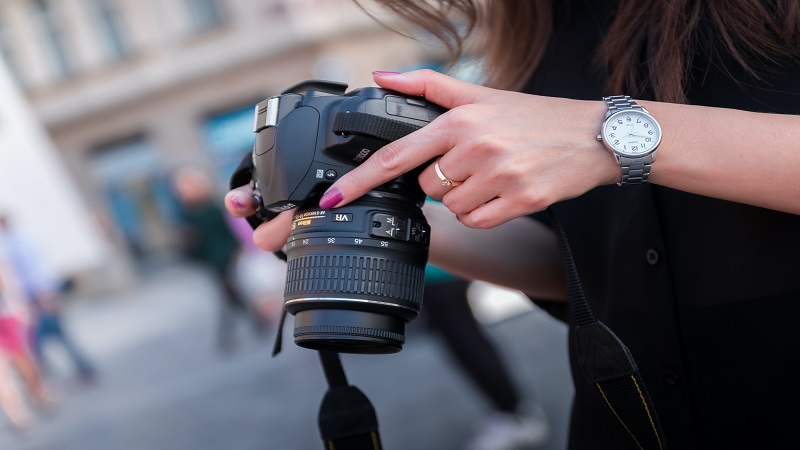
Utilize aperture priority and shutter priority mode
Assume you need to wander out of programmed mode; however, you don’t feel sufficiently sure to change to manual yet. Around there, Aperture Priority Mode (An or Av) and Shutter Priority Mode (S or Tv) are two valuable choices accessible on most cameras. They will give you more control without being excessively muddled.
Opening Priority Mode allows you to choose the gap you wish to utilize, and afterward, the camera changes the shade speed likewise. In this way, for example, in case you’re shooting a representation and need to obscure the foundation, you could choose a wide opening and let the camera sort out what screen speed is proper.
In Shutter Priority Mode, you select the screen speed you need to utilize, and the camera will choose the gap for you. Thus, if you need to get a reasonable shot of your canine dashing towards you, you can choose a quick shade speed and let the camera pick the opening for you. Note; keep in mind our brief photography tips for beginners to have good photography while capturing new photos.
Try not to be hesitant to raise the ISO.
Numerous picture takers attempt to try not to at any point shoot in high ISO as they’re apprehensive it will prompt grainy-looking photographs or ‘commotion.’ But while the facts confirm that utilizing higher ISO can prompt lower picture quality, there’s a period and spot for everything.
If you can’t bring down your shade speed because of movement obscure and amount isn’t an alternative, it’s smarter to get a sharp photograph with a bit of clamor than no photograph by any means, and you’ll have the option to eliminate a great deal of commotion in post-handling at any rate. Also, camera innovation has improved much a lot that it’s currently very conceivable to deliver astonishing photos even at ISO 1600, 3200, 6400 or higher.
One approach you can limit commotion when taking shots at higher ISOs is to utilize a more extensive gap at whatever point conceivable. Marginally overexposing your picture can likewise help since making light territories hazier in post-preparing will not build clamor, though making dull regions lighter certainly will.
Check the ISO before beginning to shoot.
Finding that you’ve coincidentally shot an entire arrangement of pictures in ISO 800 on a splendid bright day can be very disappointing, particularly if the photographs are taken to archive an uncommon event like a birthday, commemoration or different occasions.
It’s a simple enough mix-up to make, however, so to keep away from this disagreeable amazement, make a propensity for checking and resetting your ISO settings before you begin shooting anything. Then again, make a propensity for resetting this each time you’re prepared to return your camera to its pack. Note; keep in mind our brief photography tips for beginners to have good photography while capturing new photos.
Be cautious with the glimmer.
In case you’re not cautious, utilizing your camera’s underlying blaze around evening time or in low light can prompt some undesirable impacts like red eyes and unforgiving shadows. When all is said in done, it’s smarter to wrench up the ISO and get noisier photographs than to utilize the on-camera blaze and hazard demolishing the shot inside and out.
Now and again, nonetheless, there may essentially not be sufficient light, and on the off chance that you don’t have off-camera lighting, you’ll leave with no decision except to utilize the inherent blaze. If you end up in the present circumstance and don’t have any desire to miss the shot, you can do several things. As a matter of first importance, track down the glimmer settings in your camera’s menu and decrease splendor however much you can. Note; keep in mind our brief photography tips for beginners to have good photography while capturing new photos.
Second, you can take a stab at diffusing the light from the glimmer by putting something over it. Getting a piece of paper or murky scotch tape over the glimmer, for example, can help diffuse the light and mellow it. Or, on the other hand, you could bob the light off the roof by holding a touch of white cardboard before it at a point.
Figure out how to change the white equilibrium
White equilibrium can help you catch colors all the more precisely. Various sorts of light have various qualities; so on the off chance that you don’t change the white equilibrium, the tones in your photography may take on a somewhat blue, orange or green tint or ‘temperature.’ Note; keep in your mind our brief photography tips for beginners to have good photography while capturing new photos.
The white equilibrium you can fix in post-preparing. Yet, it can turn somewhat dreary on the off chance that you have many photographs that need slight changes made, so it’s smarter to get this privilege in the camera. A portion of the standard white equilibrium settings you’ll discover on your camera incorporates Automatic White Balance, Daylight, Cloudy, Flash, Shade, Fluorescent and Tungsten.
Every one of these is represented by an alternate symbol, so if you don’t know which will be which, check your camera’s manual. Programmed white equilibrium works okay in certain circumstances. However, it’s, for the most part, best to change the setting as indicated by the sort of light you’re shooting in.
Figure out how to peruse the histogram
Even though you likely look at your camera’s LCD screen to check whether you’ve accurately uncovered a picture, this is anything but a solid method to survey openness as pictures may seem more splendid or hazier on the screen than they are. The ideal approach to precisely check openness at the hour of shooting is to utilize your camera’s histogram, which is the little chart that appears close to your pictures.
Figuring out how to decipher the histogram will take some time and practice. However, the concise clarification gives you data about the apparent reach present in your picture. The left half of the chart addresses the blacks or shadows, and the correct side addresses the whites or features. Note; keep in mind our brief photography tips for beginners to have good photography while capturing new photos.
If the diagram is slanted to one side, your picture might be overexposed, and you’ll have lost a ton of detail in the lighter spaces of the photograph. On the off chance that it’s slanted to one side, it’s probably underexposed and will be excessively dull. For a more top to bottom clarification of the histogram, look at Digital Camera World’s histogram cheat sheets.
Clipping path benefits at clipping Path Specialist
Since most distributing programming manages everything far removed from clipping path service, this is advantageous for visual fashioners. This is because it works for them. They can toss photographs of your item against some other picture or foundation without managing a white foundation. Aside from these, it permits the content to wind against the first item.
I would say clipping path service is against the limits of your rectangular picture. On the off chance that you intend to keep some print material, the cut-out way is considerably more essential for you. This incorporates photographs of your items in a magazine and index. Additionally, a solitary picture result comes from numerous ways to photograph business for various items with colors. Note; keep in mind our brief photography tips for beginners to have good photography while capturing new photos.
Read more: Indoor Plants are the perfect housewarming Gifts for a variety of reasons.